Build an AI Case Study Generator
Try Text
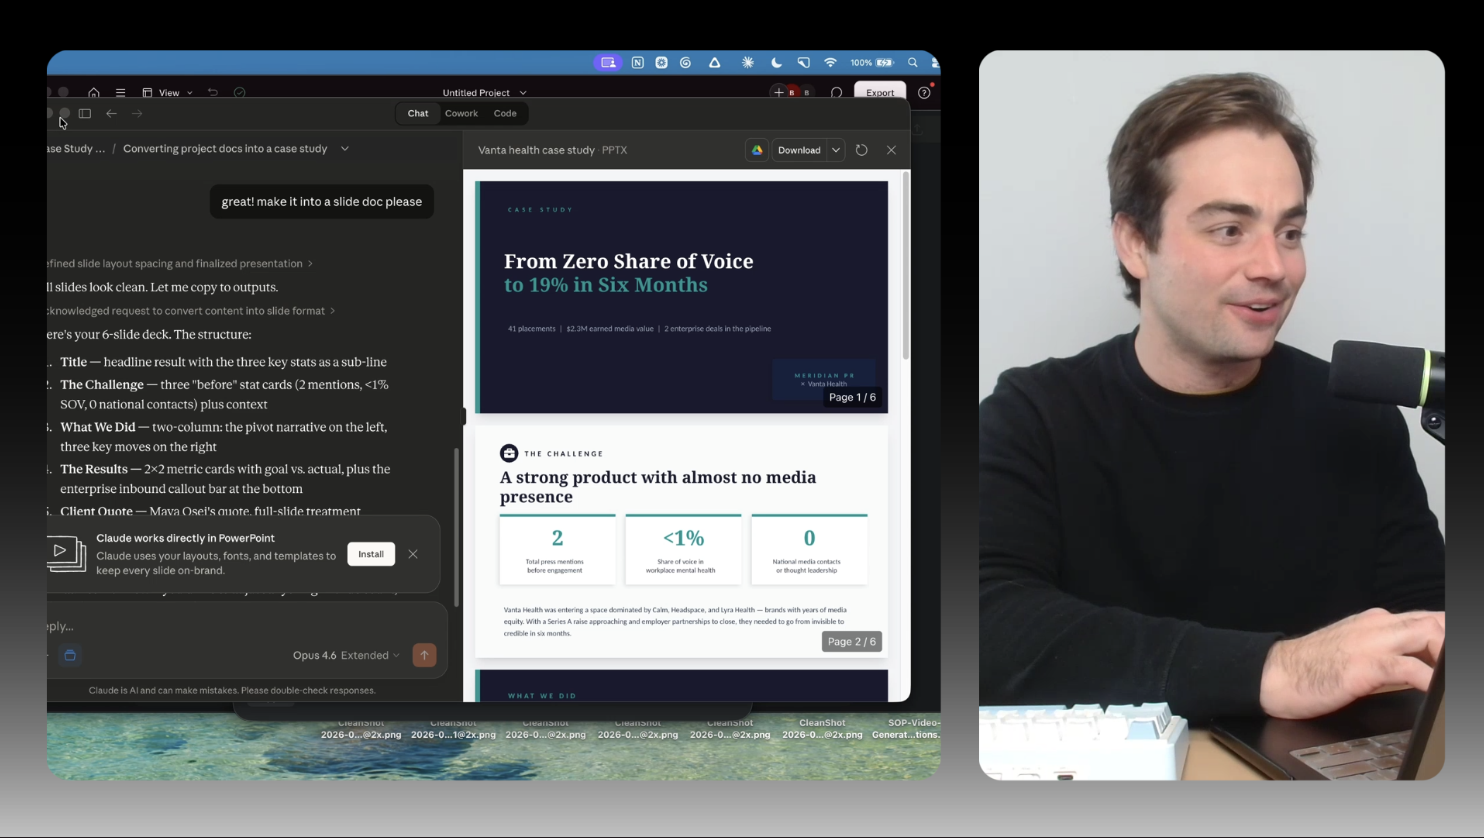
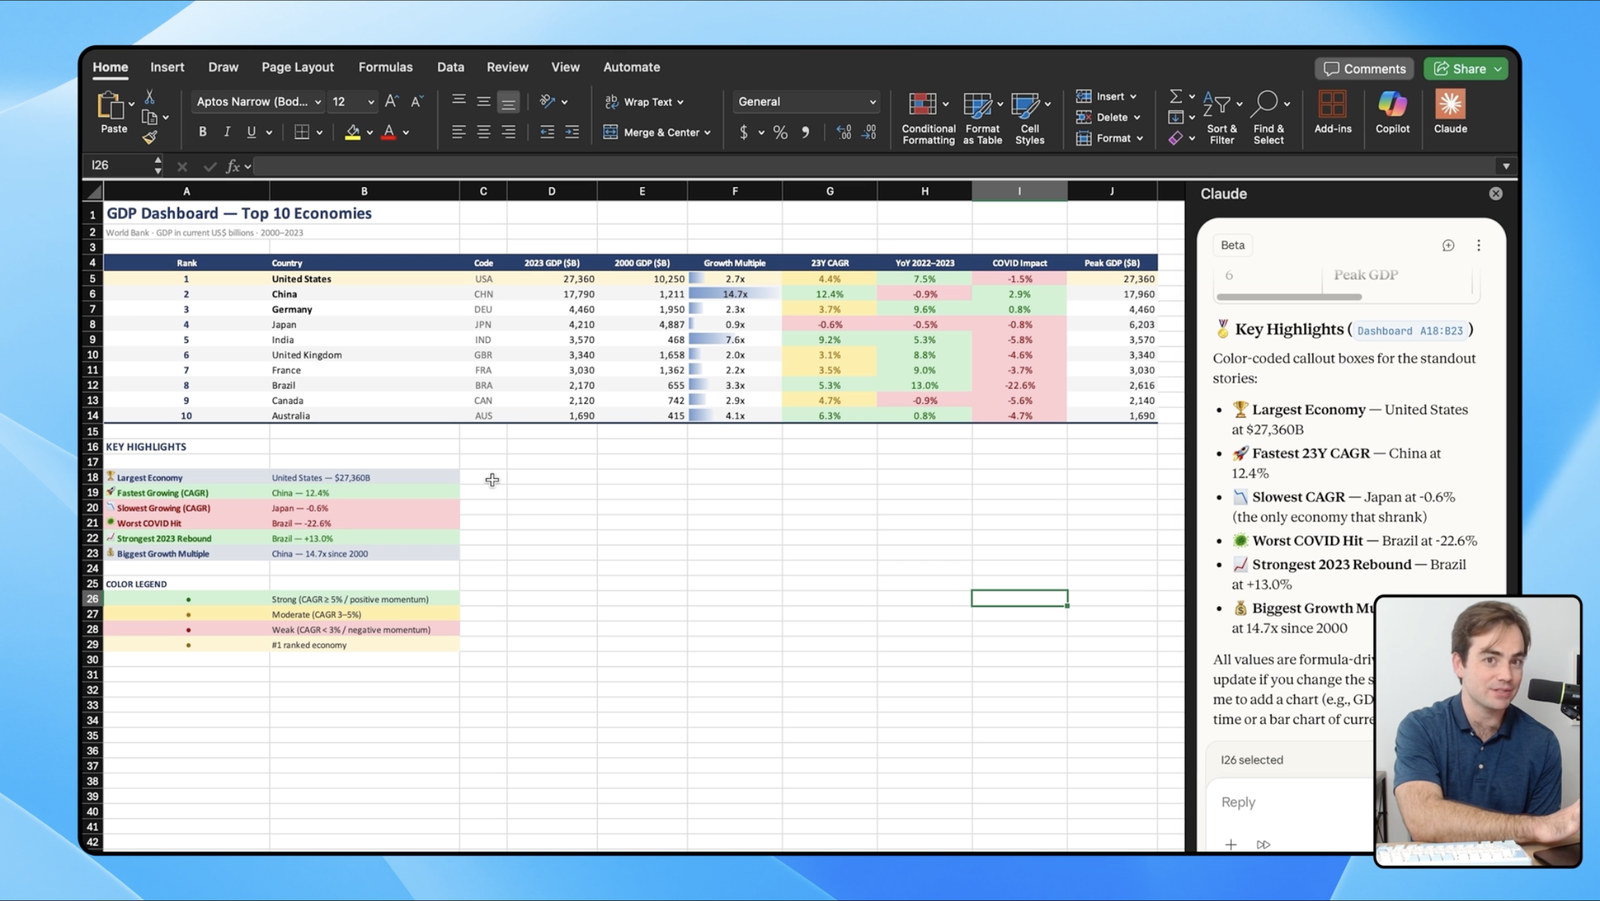
This guide teaches you how to use Claude to turn old project files into information-rich case studies you can use in proposals, on your website, or with prospects. You will set up a reusable Claude Project that stores your instructions, examples, and quality checklist, then generates a publication-ready draft from project documents in about 60 to 90 seconds when extended thinking is on.

Save 15% on Thoughtly by joining The Runway University
Through our vast network of over 100 partnerships with major AI companies, we also offer University members free access or major discounts to the many popular AI tools along with AI certified courses, daily guides on AI tools and many more.
Tools


AI training for the future of work.
Get access to all our AI courses, hundreds of real-world AI use cases, live expert-led workshops, an exclusive network of AI early adopters, and more.